
Simple DIY Fixes For Common Extension Cord Issues

There’s one electrical device that most people can’t live without. And that’s the extension cord. Think about it.
With one or more outlets, it can connect all your electrical tools and devices, thus giving you the flexibility you need.
Isn’t that convenient and reliable? Sure, it is.
However, there are electrical cord issues that can disrupt your activities.
It may become damaged, bend accidentally, or get exposed to moisture. Poor connections, sparks, and electric shocks may result. And this is common.
The Electrical Safety Foundation International (ESFI) reports that damaged plugs and cords are among the leading causes of home electrical fires.
Fortunately, you can solve these common extension cord issues with simple DIY fixes. This blog will explore these issues and provide a step-by-step process on how to do this.
DIY Fixes For Common Extension Cord Issues
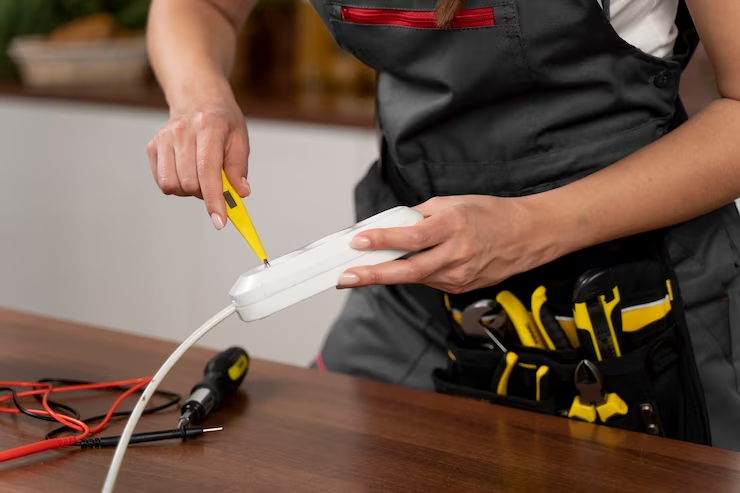
Cut Or Damaged Electrical Cord
What do you do if your electrical cord has been cut, chewed, or damaged? Would you throw it away? You probably wouldn’t.
Fortunately, simple DIY fixes can solve these common extension cord issues through a chewed cord repair by replacing the plug with a new one.
However, you should always follow the extension cord safety guide instructions.
DIY Fixes For A Cut Or Broken Electrical Code
Here is how to fix a cut electrical code:
1. Cut Off The Old Plug
Use a flush cutter to remove the dysfunctional cord. Make sure to detach the connection from the power supply before doing any cutting actions on the cord.
2. Strip The Wires
With the wire stripper, remove approximately 3/4 inch of insulation from each wire inside the cord. There should be three wires: black (hot), white (neutral), and green (ground). You should use a two-prong plug if your cable has only two wires.
3. Attach New Plug
Use a screwdriver to put the wires through the opening of the new plug (like the C13 plug). You should connect each wire to its corresponding terminal: black to brass, white to silver, and green to green.
4. Close The Plug
Tighten the plug's components by hand until they lock securely into position. Align the item meticulously while maintaining its connection to the cord for safety purposes.
Frayed Or Exposed Extension Cord

A frayed or exposed extension cord can result in short circuits, sparks, or electric shocks. However, you can fix this issue by replacing the wires with the required thickness, like this 10 gauge extension cord, and covering them with heat shrink tubing.
This relatively easy and cheap DIY cord repair project can restore your extension cord’s electrical connection and insulation.
DIY Fix For Frayed Or Exposed Extension Cord
1. Cut The Cord
Use the flush cutter when fixing power cord at the frayed or exposed area. You should have two pieces of cable with clean ends.
2. Strip The Wires
Use the wire stripper to strip about 1/4 inch of insulation from each of the wires inside both pieces of cord. You should see three wires: black (hot), white (neutral), and green (ground). If your cable has only two wires, it is not grounded, and you should use a two-prong plug.
3. Slide The Tubing
Cover the frayed or exposed area by cutting a heat shrink tubing and sliding it over one cord. Ensure it is far enough from the stripped wires so that it does not shrink when you solder them.
4. Solder The Wires
Plug in the soldering gun and let it heat up. Then, twist together the corresponding wires from both pieces of cord: black to black, white to white, and green to green. Apply solder to each twisted pair of wires and let it cool down.
5. Cover The Wires
Cover the soldered wires entirely by sliding the heat shrink tubing over them. Plug in the heat gun and apply heat to the tubing until it shrinks and seals around the cables.
Worn Out Extension Cord

An extension cord can also get worn out by frequent use, exposure to sunlight, or contact with chemicals. This process can result in the cord’s insulation becoming thin, cracked, or peeled.
However, an electrical tape repair can protect it from further damage. This quick and easy DIY project can reinforce the insulation and prevent moisture or dirt from entering the cord.
DIY Fixes For Worn Out Extension Cord
You will need electrical tape in different colors for this extension cord repair. You can buy electrical tape from any hardware store or online retailer.
1. Wrap The Frayed Area
Locate the frayed area on the cord and wrap it with electrical tape. Make sure to overlap each layer of tape by at least half an inch and cover the entire area with at least three layers of tape. Ensure a tight seal by pressing down firmly on the tape.
2. Wrap Outward Along The Cord
Continue wrapping the cord with electrical tape for a few inches on both sides of the frayed area. It will prevent further damage and provide extra protection for the cable.
Conclusion

DIY fixes for common extension cord issues are possible and cost-effective. By following these extension cord maintenance steps and using the ideal products, you can extend the life of your extension cords and keep your devices powered up.
Remember to visit Americord for high-quality extension cord products to assist in DIY repair projects.