img

Everything has its lifespan, and extension cords are not an exception. If you buy the most high-quality unit out there, you may benefit from improved longevity. But sooner or later, you will have to replace your extension cord.
If you think the replacing time has come, make sure to read this article first. It offers all the details on what you should know about extension cord plug replacement, and how to conduct it step by step.
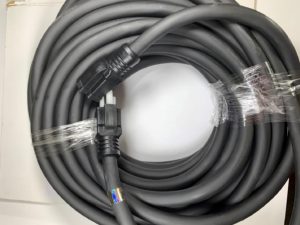
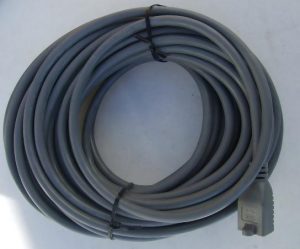
If you purchased an extension cord, you’ve bought a beneficial product that can secure electricity supply to the desired appliances. You have the choice of picking different types, such as the flat plug extension cord, which can be an aesthetically pleasing solution in many situations.
It is vital to follow the NEMA plug chart to ensure the optimal configuration of all your installations. If you haven’t followed the standard, the chances are you will compromise the performance of the cords, and affect their lifespan.
The more you use the cord, the more chances of cord wires stretching and separating the outer jacket, or sheathing, from the plug. You may also notice that the ground prong has come close and that signals you should repair the plug as soon as possible.
Many experts warn that replacing the plug is the only repair you should ever perform on extension cords. That is because of safety reasons. If you notice the wires are exposed, or there is noticeable sheathing damage, it is much better to buy a new extension cord.
You may think it is enough to wrap electrical tape around it, but you are probably not an expert. There is no way to determine the actual cord damage and whether it is a safety hazard. The tape itself does not provide shock protection. While we are talking about electrical shock, you should consider using a GFCI plug that keeps you safe from it.
The first thing you want to ensure is to have a suitable replacement plug. If you are using a 16 gauge extension cord, make sure that the replacement is adequate for that type. The entire idea is to check the wattage and amperage ratings of both plugs. They need to match, or the replacement should have a more generous rating in both categories.
Here is the list of other items that you will need for the process:
The good news is that the process shouldn’t last more than several minutes. If you are ready, let’s start with our step by step guide!
Please note that the process is the same for cables of any lengths, which means it doesn’t matter if you are changing the plug on a 25’ extension cord or another type.
Grab the utility knife and make a partial cut through the cable’s outer jacket. It is crucial to keep the cut partial. You don’t want to cut the wire insulation as that can be a big fire hazard. An approximate length of the cut should be about three inches from the cord’s end.
Now, use your fingernails to split the jacket. Follow the line of the cut and peel the sides apart. Finally, use cutting pliers and remove the loose jacket.
You should now have access to cord insulation. The next step is to remove ¾ inches from it. The easiest way to do that is to use wire strippers. You will notice that the strippers have a notch, and you should ensure it matches the wire diameter.
Do you know what an underwriter’s knot is? If you have an option, tie the hot and neutral (black and white) wires into that knot. That can be important because it minimizes the risk of wires separating from the connections to the plug if someone tugs the cord.
While you can probably make this knot on a 50 extension cord, it may not be possible in other units. That is why you can skip this part, but in that case, ensure that the cord is secured with a clamping device on the plug.
Take a look at the plug and notice terminal screws. Use a suitable screwdriver to unscrew them. Now, check where the brass terminal is. Grab the hot (black) wire and wrap its bare end around the terminal. Wrap the wire clockwise because tightening the screw will also tighten the wire loop.
Next, use your screwdriver to tighten the screws again. You don’t want any wirehair to be visible, so make sure to double-check the connection.
Move to the neutral (white) wire, and locate the silver terminal. You want to connect the wire and the terminal and then move to the ground (green) wire. That one should be connected to the ground screw.
In some cases, you won’t notice a green color on the ground screw, but the idea is to connect it to the ground prong, which has a U shape. Use gentle pulls on each of the wires to ensure the connections are stable.
Finally, use your screwdriver to tighten the clamp back.
As you can see, replacing an extension cord plug is not a difficult process. If you have several minutes to spare time, you can fix the plug easily. That way, you will prolong the longevity of the cord and get maximum value from it.
{"one"=>"Select 2 or 3 items to compare", "other"=>"{{ count }} of 3 items selected"}
Love it? Add to your wishlist
Your favorites, all in one place. Shop quickly and easily with the wishlist feature!
[title]
[message]